“I’m fine, thank you.”

One of the most dreaded questions in every English teacher’s arsenal is: How are you?

From an extremely young age, students are asked this question and given the magic response “I’m fine,” which then grows into “I’m fine, thank you,” and stagnates at “I’mfinethankyouandyou?”

(And we are all aware of the vicious cycle known as andyouism.)

imfinethankyouandyou

The great news is that, with young learners, we can attempt to eradicate this epidemia before it begins. Today, we bring you a new part of your class routine: “How are you?”

With children who are three and four years old, you can already get them telling you how they really are, instead of that they are “fine.” (And if this doesn’t have you jumping on your chair, read on…)

hello-flashcards

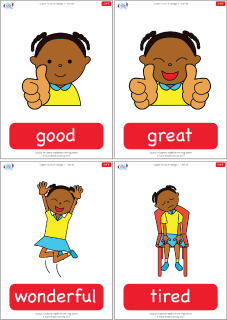
Super Simple Learning makes a wonderful set of flashcards that you can print, laminate, and use every day for this part of your class routine. Find them here.

697eabd53527b36283b4be234fa932f0

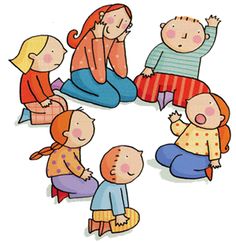
After singing a hello song and making a circle, we review the emotions flashcards and make hand play for each one that they have learned. So, “I’m good” is one thumb up, “I’m great” is two thumbs up, “I’m wonderful” is reaching up to the sky, etc.

Once we’ve reviewed, we ask the student on our left, “How are you?” and (especially at the beginning) show them the options on a flashcard. They answer and then ask the next student (lots of times, we model the first few times with, “Ana, ask Carlos, ‘How are you, Carlos?'”). Go around the circle before moving on to your next activity.

With three and four year olds, we generally use “good,” “great,” “wonderful,” and “not so good.” With older students, you can incorporate even more emotions.

When a student answers with the dreaded “I’m fine, thank you,” we often try to mimic their answer, but exaggerating their style (very fast, very quiet, very sad, etc.) It gets them laughing and very interested.

When they discover that saying “I’m fine, thank you” is way more funny than “I’m good” or “I’m great,” then we incorporate high fives for those students that answer correctly on the first try.

Soon, you’ll be knowing more about your students’ emotions and hearing less of the dreaded “I’m fine, thank you. And you?”

Our Favorite Teaching Toy

Everyone has their favorite activities in the ESL classroom (hangman, a game, perhaps a toy doll), but we have found that we reach for one toy over and over for many different ages and purposes: the ABC foam blocks. These are the kind that we use:

Chenille Kraft WonderFoam Learning Blocks, available on Amazon.com

These blocks can be used from ages 1-10 (and probably older!). Here are a few ways to incorporate these activities into your lesson:

Very Young Learners:

  • Name the colors
  • Count the blocks
  • Build a tower (4 blocks per student) and then make them count to 5 before knocking it down
  • Do different actions with your blocks: put them on your shoulder, on your hand, on your foot, on your leg, on your tummy, on your head. Count to three and then tip your head so that the block falls on the floor (a big hit!).
  • Read the numbers
  • Race to the end of a room to get a specific color out of the pile of blocks (great for when your students are so hyper that your lesson plan is sinking!)

Young primary students:

  • Group the colors, numbers, letters, etc.
  • Identify the pictures (show them quickly so it’s not so easy!)
  • Guess the color (number, etc.) with your eyes closed
  • Build a big tower, letting each student add one block, until it falls down. The student to place the last block is out!
  • Play hangman with the pictures on the block.

Older primary students:

  • Write one of the words on the blackboard from the blocks and have the group give the student that is “it” hints to guess the word. Obviously, the student that is “it” can’t look at the blackboard and the group can’t say the word on the blackboard.
  • Hide the blocks around the room and have them write prepositional statements about where they find the blocks (“The block is between the book and the pen.”)
  • Use them as conversation starters (“This block has a penguin. Penguins are animals that live in cold terrain. They eat…”)
  • Play “I’m going to Grandmother’s house and I’m taking,” and the block that they pull out of the bag is the letter that they have to use.

As you can see, if we could only invest in one teaching toy, it would definitely be this one! What’s your favorite teaching toy? Leave us a comment and let us know!

Upcycled activity for ESL Young Learners

One of the keys to keeping very young learners (ages 2-5) interested and involved in the class is to switch games or topics frequently. An activity can be anywhere from 1-5 minutes; more than that and the students simply don’t have the attention span to stay connected to the material. Particularly for young students, it’s important to use English in a natural way rather than attempting to “teach” vocabulary and grammar out of context. That’s why playing with things that don’t seem very much like a serious English lesson is often so effective at helping young learners speak more English!

We are always trying to come up with new activities that can be fun for young learners and don’t require a lot of set-up or tear-down. The longer we spend preparing an activity, the less time that our students are getting active language practice, and the more likely they are to become distracted (although you can read about some passive teaching techniques here!). We need things that work quickly and are fun!

We have been trying out a new upcycled pasta shaker and have found that it’s lots of fun! It’s also a great way to practice numbers, colors, the “stop” and “wait” commands, and to turn nervous energy into a positive learning experience!

Pasta shakers require very few things that you probably have around your house or school:

  • a clean, dry plastic bottle with a lid
  • something that children can touch and count to fill the bottle

Here’s how we play pasta shakers:

  1. Show the students your plastic bottle. Ask what it is. Ask them if it’s an apple or a banana (no!). Tell them that it’s a bottle! What can we drink out of a bottle? Milk or water!
  2. Tell the students to listen (shhhhh, listen! in a quiet voice). Shake the bottle. They won’t hear anything. Look disappointed and even be a little silly with your bottle trying to make a noise.
  3. Bring out a small box with 10 pieces of pasta (You can repeat this activity with other fillers, like marbles, clean rocks or colored pasta. Make sure that it is an age-appropriate filler and that, should a student get it in his or her mouth, there is minimal choking risk!). Show the students and say Wow, pasta! We can shake the pasta!
  4. Count each piece of pasta as you drop them into the bottle. The students should count with you. Shake the bottle and tell them, Look! We’ve made a pasta shaker!
  5. Ask the students if they would like to make a pasta shaker. You can use “Yes, please” for very young learners, or “Can I make a pasta shaker?” for older learners.
  6. Hand out the bottles to the students. Give 10 fillers to the students one-by-one and help them count as they put the fillers in the bottle.
  7. Let them shake! You can invent songs, dances, etc., to make this even more fun!

You can expand later by telling students when to stop shaking (and count to a certain number before resuming their shaking!). This will help them learn to focus on you and wait for their reward.

Finally, say goodbye to the fillers and bottles. Save your upcycled pasta shakers for the next time!

Tips for organizing small groups

If you have the benefit of a language assistant in your classroom, working in small groups can be a great alternative to traditional teaching methods! It can also help get your students excited about language learning at any age! This post will give you some tips on how to organize small groups in the classroom setting.

One of the most important parts of working in small groups is to be organized and plan ahead. It’s great to say “We’re going to work in small groups!”, but how will you break students into groups? Will the groups stay in the classroom or go to another appropriate learning environment? How will you keep track of what group’s “turn” it is for small groups? How will you deal with students who do not adapt well to the small groups environment?

These are all questions that you will need to consider when you are contemplating using small groups in your classroom. Try to have a defined idea of what exactly you will be doing and what you want to gain from small group work so that you can answer these questions as best as possible!

One of the most daunting tasks of small group work is forming the different groups with new studentswhose abilities you may not know very well at the beginning of the class. We’ve had great experience with using a short English / Science (which is given in English at our school) test on the first 2-3 days of school to place students into groups.

The idea is that the short test should build on things that students have been exposed to, perhaps in previous levels (or in their lives, their preschools, etc.), and preview what they will see during the year. We usually show students ten pictures and ask them a question, thus the test has ten points. We group students by how many points they have (the first group has the students who have scored least amount of points, and so on). This is a good system because it allows you to tailor the activities to the students’ needs and levels, but it’s also nice to mix up the levels if you find that works better for your class. That way, your more advanced students can help those who need a bit more encouragement.

(Note: We also allow ourselves the freedom to change students around in case the test was not an accurate measurement of a student’s ability. Sometimes they are nervous and are actually quite better than what the test shows, in which case they would move up a group.)

The entire test should take about 1-2 minutes to complete. It’s helpful to ask students “What is your name?” and “How are you?” before beginning to help them break into English. You can explain that you are going to show them pictures and ask them questions. We’ve found that using a soothing tone of voice and smiling helps shy learners!

Here are ten pictures and questions that you can use to organize your small group! (All of these are geared towards ESL / EFL young learners, ages 4-6).

1. Is this a boy or a girl?

2. What color is this?

3. What do you see?

4. What is he wearing?

5. Does he like fish?

6. What is she doing?

7. Who is this? (point to Mommy)

8. Where is the fish?

Copyright by Winchester Lambourne Etsy Shop

9. How is he feeling?

10. What’s the weather like?

So now that you’ve got your groups, be sure that you explain to them how small groups will work. That way, you can avoid twenty-something students screaming “What group is today?!” when you walk into the classroom.

It’s helpful to hang a small poster in the classroom with the group names (you can even get them to vote on their favorite names!) and the students in each group. You can put a bit of velcro on each group and move an arrow or other cute symbol around each group so that the students can tell what students go next in small groups! This will help things move a bit faster at the beginning of class as well.

Small groups can be a great way for students to get more individualized attention in the language-learning classroom, and these tips will help you organize great groups from the start! What have you found to be the most effective small group tactic? Leave us a comment!