Our Favorite Teaching Toy

Everyone has their favorite activities in the ESL classroom (hangman, a game, perhaps a toy doll), but we have found that we reach for one toy over and over for many different ages and purposes: the ABC foam blocks. These are the kind that we use:

Chenille Kraft WonderFoam Learning Blocks, available on Amazon.com

These blocks can be used from ages 1-10 (and probably older!). Here are a few ways to incorporate these activities into your lesson:

Very Young Learners:

  • Name the colors
  • Count the blocks
  • Build a tower (4 blocks per student) and then make them count to 5 before knocking it down
  • Do different actions with your blocks: put them on your shoulder, on your hand, on your foot, on your leg, on your tummy, on your head. Count to three and then tip your head so that the block falls on the floor (a big hit!).
  • Read the numbers
  • Race to the end of a room to get a specific color out of the pile of blocks (great for when your students are so hyper that your lesson plan is sinking!)

Young primary students:

  • Group the colors, numbers, letters, etc.
  • Identify the pictures (show them quickly so it’s not so easy!)
  • Guess the color (number, etc.) with your eyes closed
  • Build a big tower, letting each student add one block, until it falls down. The student to place the last block is out!
  • Play hangman with the pictures on the block.

Older primary students:

  • Write one of the words on the blackboard from the blocks and have the group give the student that is “it” hints to guess the word. Obviously, the student that is “it” can’t look at the blackboard and the group can’t say the word on the blackboard.
  • Hide the blocks around the room and have them write prepositional statements about where they find the blocks (“The block is between the book and the pen.”)
  • Use them as conversation starters (“This block has a penguin. Penguins are animals that live in cold terrain. They eat…”)
  • Play “I’m going to Grandmother’s house and I’m taking,” and the block that they pull out of the bag is the letter that they have to use.

As you can see, if we could only invest in one teaching toy, it would definitely be this one! What’s your favorite teaching toy? Leave us a comment and let us know!

Upcycled activity for ESL Young Learners

One of the keys to keeping very young learners (ages 2-5) interested and involved in the class is to switch games or topics frequently. An activity can be anywhere from 1-5 minutes; more than that and the students simply don’t have the attention span to stay connected to the material. Particularly for young students, it’s important to use English in a natural way rather than attempting to “teach” vocabulary and grammar out of context. That’s why playing with things that don’t seem very much like a serious English lesson is often so effective at helping young learners speak more English!

We are always trying to come up with new activities that can be fun for young learners and don’t require a lot of set-up or tear-down. The longer we spend preparing an activity, the less time that our students are getting active language practice, and the more likely they are to become distracted (although you can read about some passive teaching techniques here!). We need things that work quickly and are fun!

We have been trying out a new upcycled pasta shaker and have found that it’s lots of fun! It’s also a great way to practice numbers, colors, the “stop” and “wait” commands, and to turn nervous energy into a positive learning experience!

Pasta shakers require very few things that you probably have around your house or school:

  • a clean, dry plastic bottle with a lid
  • something that children can touch and count to fill the bottle

Here’s how we play pasta shakers:

  1. Show the students your plastic bottle. Ask what it is. Ask them if it’s an apple or a banana (no!). Tell them that it’s a bottle! What can we drink out of a bottle? Milk or water!
  2. Tell the students to listen (shhhhh, listen! in a quiet voice). Shake the bottle. They won’t hear anything. Look disappointed and even be a little silly with your bottle trying to make a noise.
  3. Bring out a small box with 10 pieces of pasta (You can repeat this activity with other fillers, like marbles, clean rocks or colored pasta. Make sure that it is an age-appropriate filler and that, should a student get it in his or her mouth, there is minimal choking risk!). Show the students and say Wow, pasta! We can shake the pasta!
  4. Count each piece of pasta as you drop them into the bottle. The students should count with you. Shake the bottle and tell them, Look! We’ve made a pasta shaker!
  5. Ask the students if they would like to make a pasta shaker. You can use “Yes, please” for very young learners, or “Can I make a pasta shaker?” for older learners.
  6. Hand out the bottles to the students. Give 10 fillers to the students one-by-one and help them count as they put the fillers in the bottle.
  7. Let them shake! You can invent songs, dances, etc., to make this even more fun!

You can expand later by telling students when to stop shaking (and count to a certain number before resuming their shaking!). This will help them learn to focus on you and wait for their reward.

Finally, say goodbye to the fillers and bottles. Save your upcycled pasta shakers for the next time!

ESL / EFL Peppa Pig Family Pre-Writing Activities

Happy New Year! We hope that everyone had a great holiday and is back to school and geared up for more fun learning!

We are starting a unit on family members with a group of students ages 3-5, so we wanted to share a few activities with you featuring one of our favorite ESL cartoons, Peppa Pig!

We will start out the unit with learning the names of the family members. We prefer the traditional “Mother, Father, Brother, Sister, Grandma, Grandpa” rather than teaching them the names of Peppa Pig’s family (Mummy, Daddy, Granny, Grandpa, etc.) You can explain that there are different names for family members if you wish, but we like to keep things simple at this age.

Here are some great Peppa Pig family flashcards thanks to ISL Collective:

Immediate Family

Extended Family

At this point, it would be great to watch clips from an episode of Peppa Pig in English, pausing the video and asking “Who is this?” for different members of the family.

To get students to begin recognizing the family members and tracing the words, use this fun coloring worksheet:

Peppa Pig Color and Trace Family Activity

Once you’ve reviewed the family members and started tracing the names, your students are ready for a bit of production! Use this simple worksheet to match the name of the family members to the pictures and then trace the words.

Peppa Pig Family Tree Match and Copy

Finally, use this fun worksheet from ISL Collective as a cut-out to practice reading and recognition skills!

Copyright en.islcollective.com

Your EFL students will love these Peppa Pig activities, and you’ll love the ease of teaching the family members.

Beautiful ESL Christmas Activities to Display

It’s that time of year! We are rehearsing “Jingle Bells,” we are juggling exams and grading, and we are trying to teach our students a bit about our English-speaking cultural holiday traditions! At our school, we focus on Christmas, although many of our activities have a general winter theme so that we don’t interfer with anyone’s cultural or religious followings.

Today we’re sharing our three new activities for this year!

1. Very young ESL learners and The Christmas Tree

One of the first things that we teach students when studying about Christmas is the tradition of a Christmas tree. This can tie in nicely with their science courses (the parts of a tree; deciduous vs evergreen; trees around the world; etc.) and the vocabulary is easy enough.

We use the Christmas carol O Christmas Tree as a sing-a-long in the class. Then, each student gets to decorate an ornament (which we found on Google Images and pasted to card to make them sturdy) and hang it on our big primary tree.

20141210_124253

Copyright lessonplansesl.wordpress.com

20141210_124343

Copyright lessonplansesl.wordpress.com

Finally, help them read the lyrics to O Christmas Tree that you’ve printed out on a piece of paper. Add a color-by-number Christmas tree to half of the paper and fast finishers can color another beautiful decoration!

2. Dextrous ESL learners and The Recycled Snowman

This activity is great paired with a cute story about a snowman or playing in the snow. We found three appropriate stories in English in the youth section of our local library, and Amazon.com and Abebooks.com has lots of possibilities! (Don’t forget that you can download lots of ebook options if you have a projector in your class!)

Then we make a little snowman out of a recycled toilet paper roll (ah, the neverending craft supply box!) and a recycled sock. Googly eyes and white stickers that can be painted as buttons and then stuck on quickly help this activity to run smoothly. This requires a bit of preparation, but this website walks you through it. These are super adorable but not for tiny fingers!

20141210_110053

Copyright lessonplansesl.wordpress.com

20141210_110033

Copyright lessonplansesl.wordpress.com

3. Late Primary Students and The Snowflake Wonderland

Moving away from the traditional themes of Christmas and more towards the theme of winter wonderland, this activity allows us to talk about the science behind snowflakes. Why do snowflakes form (lesson on solids, liquids and gases)? How many sides do snowflakes have (lesson on geometry and symmetry)? Where can we see snowflakes (general winter vocabulary lesson)? Have you seen any films with snowflakes (our students are going crazy – in a good way – when they sing “Let it Go” from the film Frozen and then gap fill the lyrics)?

As a craft, they can make their own paper snowflakes and create a winter wonderland in a room or corridor. This website teaches you how to make them (depending on the age, your students might need a bit of help with the last step before cutting).

20141210_125330

Copyright lessonplansesl.wordpress.com

20141210_125349

Copyright lessonplansesl.wordpress.com

All of these activities will please parents and other teachers, decorate your learning space (think less bulletin board duties for you!), and give your students a great use for their pre-holidays energy.

What’s your favorite Christmas activity? Share it with us in a comment! And have a happy holiday season!

Tips for organizing small groups

If you have the benefit of a language assistant in your classroom, working in small groups can be a great alternative to traditional teaching methods! It can also help get your students excited about language learning at any age! This post will give you some tips on how to organize small groups in the classroom setting.

One of the most important parts of working in small groups is to be organized and plan ahead. It’s great to say “We’re going to work in small groups!”, but how will you break students into groups? Will the groups stay in the classroom or go to another appropriate learning environment? How will you keep track of what group’s “turn” it is for small groups? How will you deal with students who do not adapt well to the small groups environment?

These are all questions that you will need to consider when you are contemplating using small groups in your classroom. Try to have a defined idea of what exactly you will be doing and what you want to gain from small group work so that you can answer these questions as best as possible!

One of the most daunting tasks of small group work is forming the different groups with new studentswhose abilities you may not know very well at the beginning of the class. We’ve had great experience with using a short English / Science (which is given in English at our school) test on the first 2-3 days of school to place students into groups.

The idea is that the short test should build on things that students have been exposed to, perhaps in previous levels (or in their lives, their preschools, etc.), and preview what they will see during the year. We usually show students ten pictures and ask them a question, thus the test has ten points. We group students by how many points they have (the first group has the students who have scored least amount of points, and so on). This is a good system because it allows you to tailor the activities to the students’ needs and levels, but it’s also nice to mix up the levels if you find that works better for your class. That way, your more advanced students can help those who need a bit more encouragement.

(Note: We also allow ourselves the freedom to change students around in case the test was not an accurate measurement of a student’s ability. Sometimes they are nervous and are actually quite better than what the test shows, in which case they would move up a group.)

The entire test should take about 1-2 minutes to complete. It’s helpful to ask students “What is your name?” and “How are you?” before beginning to help them break into English. You can explain that you are going to show them pictures and ask them questions. We’ve found that using a soothing tone of voice and smiling helps shy learners!

Here are ten pictures and questions that you can use to organize your small group! (All of these are geared towards ESL / EFL young learners, ages 4-6).

1. Is this a boy or a girl?

2. What color is this?

3. What do you see?

4. What is he wearing?

5. Does he like fish?

6. What is she doing?

7. Who is this? (point to Mommy)

8. Where is the fish?

Copyright by Winchester Lambourne Etsy Shop

9. How is he feeling?

10. What’s the weather like?

So now that you’ve got your groups, be sure that you explain to them how small groups will work. That way, you can avoid twenty-something students screaming “What group is today?!” when you walk into the classroom.

It’s helpful to hang a small poster in the classroom with the group names (you can even get them to vote on their favorite names!) and the students in each group. You can put a bit of velcro on each group and move an arrow or other cute symbol around each group so that the students can tell what students go next in small groups! This will help things move a bit faster at the beginning of class as well.

Small groups can be a great way for students to get more individualized attention in the language-learning classroom, and these tips will help you organize great groups from the start! What have you found to be the most effective small group tactic? Leave us a comment!

Rewarding Good Behavior (aka Trying to Avoid Bad Behavior)

We’ve all been there: you have such an amazing lesson that you’ve worked on during your entire weekend, you get to class on Monday morning ready to make your students have so much fun that they forget they’re learning, and then one student decides to act up and throws the class behavior out of whack. Ok, for some of us, this sounds like everyday in the classroom!

Young learners are particularly vulnerable to bad behaviors because they are still “learning the rules” of the learning environment. Not only are you teaching them English, but you are also teaching them how to behave in a classroom setting.

There are several types of negative behaviors that young learners often exhibit. One of them is not paying attention to the teacher or listening to his or her instructions. This is often the most difficult one for the teacher, because we feel it is a personal affront to our authority. Perhaps another student prefers to play with and/or distract his or her neighbor instead of looking at the teacher. Yet others will cry non-stop in the classroom, because they miss mommy and daddy, because they didn’t win at an activity, because they are still adjusting to school, because they don’t feel well, because… you get the picture.

The first and most important technique for dealing with negative behavior is to not let it affect you personally. Try not to let these behaviors raise your blood pressure, produce anxiety, or make you angry. (Yes, we all realize that this is easier said than done.) Try to remain cool and calm.

Copyright Keepcalmandposters.com

One of my personal zen moments always happens when I go to a shopping center here in Madrid. Seeing children running, playing, acting insane despite their parents’ desperate please… it all makes me realize that kids are kids, and their favorite “This is boring” statement is not a personal affront to my (ahem, awesome) lesson plan.

Now that we’re all cool as a cucumber, how can we discourage negative classroom behavior? One trick to try is to refrain from punishing negative behaviors, and rather reward positive behaviors.

Here’s how you can reward positive behaviors with young learners.

For very young learners (1-3 years old), you reward by allowing them to participate in really fun activities! Keep their interest in what you are doing and make them participate vocally in order to join in the activity. For example, if you are teaching your students how to wait in the classroom, try using maracas. Make each student ask for a maraca (“A maraca, please” or “Yes, please”) before they can join in on the shaking fun! Then yell STOP! and place your maraca in front of you. Wait for everyone to do the same. Once they all have the maracas in front of them, count 1 – 2 – 3 – 4 – 5 and then pick up your maraca and shake to your heart’s content! Repeat the stop and counting several times. This will teach them in a fun way that they should wait their turn, wait for the teacher, and stop and pay attention when the teacher gives the keyword stop. Give a reward to the ones who demonstrate good behavior consistently (a sticker for the first student to stop, etc.).

For students ages 3-5, you can start working on reward systems in order to encourage good behaviors and discourage bad behaviors. One great way to do this is to reward on the spot for good behaviors. Little Marcos is sitting properly in his chair? Say “An applause for Marcos! You’re sitting properly!” and wait five seconds until everyone else catches on and sits properly. Other great ways to reward this age group is with a favorite song (“Wow, you’re all sitting properly! Good job! I’m very happy! Let’s sing…”) or short game. If you have one student who is really messing things up, leave them out of the activity (“Sorry Sergio, but you have to sit properly if you want to play the game.”) The idea is to show them that good behaviors lead to fun!

For students 5-8, one of my favorite good behavior techniques is the No Monkey Business! Poster

Copyright lessonplansesl.wordpress.com

Copyright lessonplansesl.wordpress.com

At the end of every class, students get to put a sticker on the monkey if they have had good behavior collectively! I laminate copies of this poster for each class. When they get a certain number of stickers (10, 20, whatever you decide) then the class gets a prize! This can be a physical prize – like a new pencil, a rubber, or a piece of candy, if it’s allowed – or a chance to play a special game that they love! You can always use “the Monkey” to quell negative behavior as soon as it pops up (“If you continue, there will be no sticker for the Monkey”). 

I laminate the poster because, if the behavior is truly hideous, I will take a sticker away and make a big deal out of it.

By trying to encourage positive behaviors with rewards and fun activities, you automatically discourage negative behaviors without punishment. Although avoiding punishment forever is unrealistic in a learning environment, if you try to encourage good behavior first, you will find that you are punishing much less!

What is your favorite positive behavior reinforcement technique? Leave us a comment!

Nine Favorite Teaching Supplies for Hundreds of Classroom Activities

Gearing up for a new school year often means lots and lots of lesson planning, professional development courses and shopping for teaching supplies. In the US, many schools started last week or this week, but in Spain, August equals vacation, and schools won’t begin until at least September 1.

Of course, that means that teachers are already thinking about the next school year! Today, we thought that we’d share nine of our favorite new teaching supplies for young learners and a few activities that you can do with them! They are our favorites because they so versatile that you can get hundreds of activities out of these 9 toys.

Collage 1

Nine of our favorite new teaching supplies for 2014-2015!

Let’s start with a description of each product from left to right (top to bottom), where you can buy it, and prices:

  1. Ikea Lekkamrat Toy Bath Set – We found these on clearance at Ikea for 3.99€ per set. 
  2. Magnetic Capital Letters – This set of 48 letters was purchased at Dideco for 5.52€ (including teacher’s discount of 20%. See details here.)
  3. Ikea Titta Djur Finger Puppets – This set of 10 animal puppets was found at Ikea for 4.99€. I’ve used these with toddlers before, and they are amazingly durable!
  4. Rainbow Mini Soft Plastic Animals – This tube of 8 rainbow animal puppets was purchased at Dideco for 8.21€ after teacher’s discount (about 1€ per animal).
  5. Portable or Mountable 40x60cm Magnetic Whiteboard – Purchased at Dideco for the amazing price of 6.26€ after teacher’s discount. This is perfectly transportable for those of us who teach on the go! Also available in 60x90cm for about 12€.
  6. Learning Resources Farmers Market Color Sorting Set – This amazing and versatile set of toys and buckets was purchased on Amazon.com for $22.99. This item will ship to Madrid, and though it’s one of more expensive investments of the year, it’s awesome!
  7. Julia Doll – This 23cm tall little blonde was found at Dideco for 12.60€ after teacher’s discount.
  8. Animal Sponges for Painting – Also from Dideco, this set of 10 sponges was a steal for 4.87€. They also have modes of transportation and other common objects!
  9. Fabler Björn Teddy Bear – At the steal price of 0.99€ per teddy, our budget stretched to allow each of our seven very young learners (2-3 year old class level) to have their own “baby” for class activities. They fit into Ikea’s small Kassett boxes (2/2.99€), which means that they can be a surprise for every class!

Now what can we do with these toys (ahem, teaching supplies) that make them amazing for ESL young learners?

For example, the Farmers Market Color Sorting Set has so many functions that it makes the steep price tag worth it. With very good reviews and made of quality materials, this set will last a long time with a bit of care. You can wipe down the fruits and baskets with baby wipes without worrying about the color running (like it would with other cheaper sets and wooden food sets). With your very young learners (2-3), you can:

  • Count the number of each color fruit or veg that you see to practice numbers.
  • Play the game the intended way and sort each piece by color. Hide the pieces around your learning environment, and this will be even more fun!
  • Begin to introduce basic foods. The size of these pieces means that you can mime “eating” your favorite fruit or veggie and let children do the same (“Would you like an apple?” “Yes, please.” / “An apple, please.”)
  • Introduce like and dislike with foods. The following really funny video is easy for very young learners to learn and understand, and you can use the foods included in this set to make up your own funny combinations!
  • Set up a “play market,” where students can shop – with recycled ecological bags – for their own meals. You can give them fake money, but be careful of small plastic parts!
  • Play toss and catch with a piece of fruit. The student that catches it must say the name in order to continue throwing. If they get it wrong, they go in the middle of the circle until another student makes a mistake!
  • Use the fruit and veggies as realia to accompany learning songs, like this one:

As you can see, there are so many possibilities from one object!

For older young learners (5-7 years old), you can do even more activities because of their increased memory skills. For example, combine the fruits with the magnetic whiteboard and the magnetic letters, and give a student a piece of fruit or veg and let them spell it out for the class!

You can really maximize your minimal (or non-existent) teaching supplies budget by choosing products that have more than one use in the classroom.

Let’s take a look at one more of my favorite products: the Ikea Toy Bath Set. Very young learners are learning all about hygiene in their own homes, so this is a chance to capitalize on knowledge that they already have! With this one toy, you can:

  • Pretend to bathe Julia, baby Teddy, or any other toy that you have in the classroom. Students with good behavior can bring in their favorite doll to get a bath! This allows you to review vocabulary related to the bath in the classroom, even the rubber ducky and shampoo! Let’s expand on that idea with a favorite song:
  • You can emphasize that some dolls are big, big and others are babies by how they sit down, stand up, and lie down in the bath!
  • You can practice washing body parts with a set of sponges. If you put Teddy and a bath sponge (very cheap investment at Dollar Stores or Bazaars) in a small box and give one to each student, they get a fun surprise inside the box and they can copy your example with a bigger doll in the bathtub. Let them wash (“wash, wash, wash hands, hands, hands”) hands, face, tummy, legs, arms, etc. This can go a long way when you are teaching basic face and body parts!
  • You can practice wet and dry! Put a plastic bin inside the bathtub – the bathtub is not waterproof – and let students bathe the Rainbow Soft Plastic Mini Animals. Then dry them with a towel. Practice the words “wet, wet” and “dry, dry.”
  • Read any children’s story about taking a bath (here are a few examples) and pretend that Teddy is afraid to take a bath. Help him over his fear and get him to enjoy the bath! Let your students follow your example.

As you can see, the trick to having a diverse and fun ESL class with young learners doesn’t depend on how many toys you have in your bag, but how many different ways you can incorporate familiar toys into the class routine. By keeping things fun and exciting, you and your students will love toys that they’ve seen countless times! 

Now it’s your turn: what activity would you do with one of the above toys? Leave us a comment!

Favorite Passive Teaching Techniques

During an ESL class, we want as much active learning time as possible! Repeating vocabulary with flashcards, role plays to practice a new theme, communicative information gaps, all of these activities and many more are what make up the meat and potatoes of our class time.

But did you know that students can still learn even when they aren’t actively engaged with the teacher? Everyday moments in the classroom that aren’t part of “active teaching” can be effective at helping your young learners gain more contact with speaking and understanding English.

Think about these moments when the class is not engaged with the teacher:

  • Before the class begins, particularly in class situations where the students or teacher change classrooms and have to prepare for the lesson
  • If the teacher needs to work one-on-one with a student who has a particular difficulty and the other students are engaged in completing an activity
  • When students are completing a cut-out, a coloring activity, a self-test at the end of a chapter, or a worksheet on their own for practice (5 year olds already do all of these alone in Spain.)
  • If an emergency occurs and the teacher must leave the classroom momentarily to get help or to help another teacher or student
  • When the class is wrapping up

While these aren’t ideal situations, they occur everyday in the classroom, and they take away time from the student’s direct engagement with the teacher. But by using passive teaching techniques, we can keep the students involved with the target language!

These passive moments don’t mean that students have to lose contact with the target language! Image Copyright The Guardian

passive learning technique is any tool that the teacher uses to expose the students to English when he or she is not directly in front of them, commanding the attention of the class and interacting directly with the class.

Let’s take the example above, when students are waiting for the class to begin. In our school, teacher must switch classrooms every hour (and every 45 minutes in the afternoon) beginning in first grade of primary, and the students must sit for about 5 minutes while the teacher moves and prepares for the next class. Well, it doesn’t take much (a forgotten book, a crying child, a bathroom emergency) for those 5 minutes to turn into 10 minutes, and then you’ve lost a portion of your time to expose students to English. What passive learning techniques can we use to avoid that loss?

One of my favorite passive learning techniques is the mini-teacher system. The mini-teacher is responsible for controlling the behavior of the students while the teacher is absent from the class. The mini-teachers are chosen randomly each week, and if a student needs to say something while the teacher is away, he or she must raise his/her hand until the mini-teacher says that s/he can speak. This interaction should be done in English (and the questions that they ask are part of everyday English vocabulary: “Can I go to the toilet?” “May I drink water?” “What class is next?”, etc). If you begin this tradition at the start of the year, by the end of the year, you will walk into well-controlled classrooms that are already getting into the “English mode.”

Have each student decorate their hand print at the beginning of the year, put a bit of velcro on the back, and shuffle them in a box to “pick” the mini-teacher fairly each week. Display their handprint in the classroom so that everyone knows who is the mini teacher! Image Copyright theneighborhoodmoms.com

Another one of my favorite passive learning techniques is the calendar. The calendar manager is also chosen each week and is responsible for updating the calendar at the beginning of each English class. If you invest in an awesome calendar like the following, your calendar manager can do lots of activities that the class – after a week or two of practice – will be able to complete quickly and in English:

Picture Copyright learningenglish-esl.blogspot.com I have seen similar calendars in English and French at Dideco in Spain!

What can your calendar manager do each day?

  • Days of the week – The calendar manager leads the classroom in a choral recitation of the days of the week and then puts the proper day on the calendar.
    • You can expand on this by asking “What day was yesterday?” and “What day will tomorrow be?” when students get used to this step!
  • Months of the year – The same as Days of the week, but with months of the year
  • What’s the weather like today? – The calendar manager asks “What’s the weather like?” and students raise their hands to answer. The calendar manager chooses a volunteer and puts up the proper picture on the calendar
  • What year is it? – It seems overly simple, but this really helps students get used to how we say the years in English!
  • Is today a special day? – This gives students the opportunity to tell the class something important about their lives, like “It’s my birthday!”, “It’s Halloween!”, or “I have a new baby sister!” There’s nothing that primary students love more than to talk about their own lives, so you might have to cut off this activity!

Another great passive learning technique is using background music in the classroom. We are huge fans of using multimedia in the classroom, and this is a great way for students to sing along to familiar and new songs when they are engaged in individual activities, like coloring, cut-outs, tidying up, etc. You can bring a USB with great songs ready to go and put it on when students are working individually, or if you need to give special attention to one or two students for a few moments. 

And lastly, for those moments when the lesson is finishing up and it’s time to go home, try singing a song as a class during those last few moments. This will also help with your classroom routine, sending the signal to students that it’s time for the class to end. I love this one by The Learning Station:

If you have more than a few moments (say, 10 minutes), but you don’t want to start the next lesson and are allowing the students free play time, try to encourage them to play in English. You can do this by:

  • providing puzzles or play dough (plasticine) and ask them to make something that you’ve spoken about in the lesson and show their friends
  • keeping an English library in the classroom where students can look at or read books in English
  • letting students play with a selection of English board games. I love the Orchard Toys games in English for primary students, but they love them more!

Orchard Toys games are awesome! They’re available at Dideco – with a 20% teacher’s discount! – in Spain.

So the next time that you are thinking about “wasted” class time, think of a passive learning technique that will expose students to English for those moments when they aren’t actively involved in a lesson. What passive learning techniques work well for you? Share them with us in a comment!

Going Bananas for Numbers!

If you’re looking for a way to spruce up your lessons on numbers 1-10, just go bananas!

It’s a great idea to incorporate different types of materials into each theme. For example, if you just practicing counting 1-10, both you and your students are going to get pretty bored, pretty quickly. But if you include a song, a story, a craft, a game or an activity where students get to move around, then they are going to learn the lesson in the context of the activity. They’ll be having so much fun that they won’t even realize that they’re learning, and you’ll be one happy teacher!

Here’s a great idea for a few ways to teach numbers 1-10 using the context of a banana…

Let’s start with a song. This song is great for very young learners, and you can expand on it for slightly older students (6-7) by asking what each group of bananas is doing:

Now let’s go for a game to reenforce the numbers that they have learned in the song. This game is great for small groups, but if you want to do it with a larger group, you just have to duplicate (or triplicate) the materials. I call this the “Banana Clothespins Game,” and it requires a little bit of preparation. You’ll need:

  • 10 half-sheets of card or paper, each decorated with 1-10 bananas (you can draw the bananas or print them on a computer)
    • These will be your 1-10 banana flashcards!
  • 55 clothespins (full-size clothespins work best for little fingers, but recycle them from home if you have them!)

Once you have your materials prepared, you’re ready to play!

Example of banana flashcards. Image Copyright Super Simple Learning.

  • Begin by showing the students the 1 banana flashcard and put 2 clothespins on it. Ask if it’s correct and let them help you fix it. Repeat with another banana flashcard, first giving the incorrect number and letting the students help you. Then give them two correct examples.
  • Now put all of the banana flashcards face-down and shuffle them. Deal them out evenly among students. Tell them that it’s a surprise and not to turn them over!
  • Put the clothespins in the middle of the group.
  • Explain the gameplay: Each student turns over his or her flashcards and puts the correct number of clothespins on the card. The first to finish all of his or her flashcards correctly wins (so you might want to make sure that you deal each student some high and low numbers to keep things fair).
  • Children love this game, and it can be played several times to review the numbers!

Now that students have practiced the numbers, let’s tell them a story about a little banana who falls out of a tree and wants to return to his family! This story is called “Fruit Story: ESL numbers/colors/fruit.” It also incorporates other fruits as well as colors!

If you are lucky enough to have a big budget for your classroom, you can also invest in this awesome monkey counting game that can be played in small groups. It’s available on Amazon!

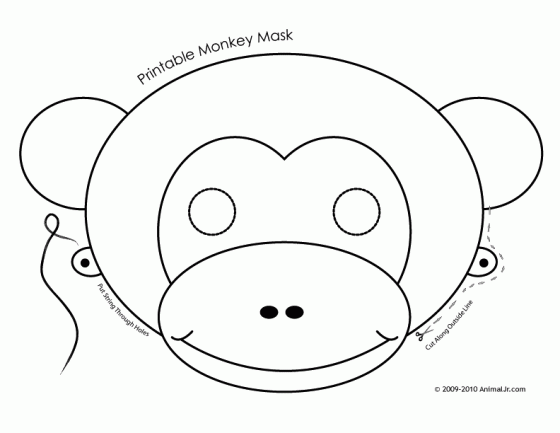
Now that we’ve talked gone bananas over numbers, let’s make a craft! What animal loves bananas more than anything else? Monkeys! Let your students make a monkey mask, helping them to cut out the eyes carefully. You’ll need a little yarn to tie on the mask.

Courtesy of craftjr.com

Courtesy of craftjr.com

You can print off some bananas with this image and let each student “feed the monkeys.” Try to print 10-15 on one page so that you can give students different numbers to practice! This is a great way to review counting again, as you can ask how many bananas they are feeding each other. Let them show the rest of the group and then do it in pairs!

These activities will give you several fun classes to learn and review the numbers 1-10 with your young learners! Just don’t go bananas when you hear students ask again for the banana song!


A New Twist for Old MacDonald

Old MacDonald is one of the most tried and true ways to introduce animals to ESL / EFL young learners. So what do you do when students say “I already know this song?”

How much fun would this be for young learners? Game available from bigjigstoys.co.uk

Here are a few ways that you can put a new twist on Old MacDonald.

First, I love this video by Super Simple Learning: Old McDonald by Super Simple Learning. This video is great because it introduces different animals and kids can sing along but it includes a new area of this age-old topic: what do the animals say?

Next, I love these flashcards to play simple games: ESL-kids.com Animals Flashcards. You can play “Guess the animal,” “Charades (again, the animal sounds from the previous song come in handy!),” “What color is the animal?,” etc. You can print them with or without words and choose your own images based on what you want to teach.

Finally, I love to let my young learners create their own farm. I use a blank farm template (like this one) and give them lots of little animals (like these or these). They love cutting, coloring, and gluing the animals in their own farms. Give them some special decorations like glitter glue or water colors and they will be entertained for hours!

Once your little ones master the MacDonald, you can expand their animal learning with other awesome activities!

One of my favorites is based on the song “Walking in the Jungle” by Super Simple Songs. Students love this song, especially if they mimic the motions of the children!

Then, grab a bunch of hand puppets (such as these, available on Amazon.com) and repeat the song with your own animals. Let your students decide if “they are afraid!”

What’s your favorite way to teach animals to young learners?