Upcycled activity for ESL Young Learners

One of the keys to keeping very young learners (ages 2-5) interested and involved in the class is to switch games or topics frequently. An activity can be anywhere from 1-5 minutes; more than that and the students simply don’t have the attention span to stay connected to the material. Particularly for young students, it’s important to use English in a natural way rather than attempting to “teach” vocabulary and grammar out of context. That’s why playing with things that don’t seem very much like a serious English lesson is often so effective at helping young learners speak more English!

We are always trying to come up with new activities that can be fun for young learners and don’t require a lot of set-up or tear-down. The longer we spend preparing an activity, the less time that our students are getting active language practice, and the more likely they are to become distracted (although you can read about some passive teaching techniques here!). We need things that work quickly and are fun!

We have been trying out a new upcycled pasta shaker and have found that it’s lots of fun! It’s also a great way to practice numbers, colors, the “stop” and “wait” commands, and to turn nervous energy into a positive learning experience!

Pasta shakers require very few things that you probably have around your house or school:

  • a clean, dry plastic bottle with a lid
  • something that children can touch and count to fill the bottle

Here’s how we play pasta shakers:

  1. Show the students your plastic bottle. Ask what it is. Ask them if it’s an apple or a banana (no!). Tell them that it’s a bottle! What can we drink out of a bottle? Milk or water!
  2. Tell the students to listen (shhhhh, listen! in a quiet voice). Shake the bottle. They won’t hear anything. Look disappointed and even be a little silly with your bottle trying to make a noise.
  3. Bring out a small box with 10 pieces of pasta (You can repeat this activity with other fillers, like marbles, clean rocks or colored pasta. Make sure that it is an age-appropriate filler and that, should a student get it in his or her mouth, there is minimal choking risk!). Show the students and say Wow, pasta! We can shake the pasta!
  4. Count each piece of pasta as you drop them into the bottle. The students should count with you. Shake the bottle and tell them, Look! We’ve made a pasta shaker!
  5. Ask the students if they would like to make a pasta shaker. You can use “Yes, please” for very young learners, or “Can I make a pasta shaker?” for older learners.
  6. Hand out the bottles to the students. Give 10 fillers to the students one-by-one and help them count as they put the fillers in the bottle.
  7. Let them shake! You can invent songs, dances, etc., to make this even more fun!

You can expand later by telling students when to stop shaking (and count to a certain number before resuming their shaking!). This will help them learn to focus on you and wait for their reward.

Finally, say goodbye to the fillers and bottles. Save your upcycled pasta shakers for the next time!

Beautiful ESL Christmas Activities to Display

It’s that time of year! We are rehearsing “Jingle Bells,” we are juggling exams and grading, and we are trying to teach our students a bit about our English-speaking cultural holiday traditions! At our school, we focus on Christmas, although many of our activities have a general winter theme so that we don’t interfer with anyone’s cultural or religious followings.

Today we’re sharing our three new activities for this year!

1. Very young ESL learners and The Christmas Tree

One of the first things that we teach students when studying about Christmas is the tradition of a Christmas tree. This can tie in nicely with their science courses (the parts of a tree; deciduous vs evergreen; trees around the world; etc.) and the vocabulary is easy enough.

We use the Christmas carol O Christmas Tree as a sing-a-long in the class. Then, each student gets to decorate an ornament (which we found on Google Images and pasted to card to make them sturdy) and hang it on our big primary tree.

20141210_124253

Copyright lessonplansesl.wordpress.com

20141210_124343

Copyright lessonplansesl.wordpress.com

Finally, help them read the lyrics to O Christmas Tree that you’ve printed out on a piece of paper. Add a color-by-number Christmas tree to half of the paper and fast finishers can color another beautiful decoration!

2. Dextrous ESL learners and The Recycled Snowman

This activity is great paired with a cute story about a snowman or playing in the snow. We found three appropriate stories in English in the youth section of our local library, and Amazon.com and Abebooks.com has lots of possibilities! (Don’t forget that you can download lots of ebook options if you have a projector in your class!)

Then we make a little snowman out of a recycled toilet paper roll (ah, the neverending craft supply box!) and a recycled sock. Googly eyes and white stickers that can be painted as buttons and then stuck on quickly help this activity to run smoothly. This requires a bit of preparation, but this website walks you through it. These are super adorable but not for tiny fingers!

20141210_110053

Copyright lessonplansesl.wordpress.com

20141210_110033

Copyright lessonplansesl.wordpress.com

3. Late Primary Students and The Snowflake Wonderland

Moving away from the traditional themes of Christmas and more towards the theme of winter wonderland, this activity allows us to talk about the science behind snowflakes. Why do snowflakes form (lesson on solids, liquids and gases)? How many sides do snowflakes have (lesson on geometry and symmetry)? Where can we see snowflakes (general winter vocabulary lesson)? Have you seen any films with snowflakes (our students are going crazy – in a good way – when they sing “Let it Go” from the film Frozen and then gap fill the lyrics)?

As a craft, they can make their own paper snowflakes and create a winter wonderland in a room or corridor. This website teaches you how to make them (depending on the age, your students might need a bit of help with the last step before cutting).

20141210_125330

Copyright lessonplansesl.wordpress.com

20141210_125349

Copyright lessonplansesl.wordpress.com

All of these activities will please parents and other teachers, decorate your learning space (think less bulletin board duties for you!), and give your students a great use for their pre-holidays energy.

What’s your favorite Christmas activity? Share it with us in a comment! And have a happy holiday season!

Going Bananas for Numbers!

If you’re looking for a way to spruce up your lessons on numbers 1-10, just go bananas!

It’s a great idea to incorporate different types of materials into each theme. For example, if you just practicing counting 1-10, both you and your students are going to get pretty bored, pretty quickly. But if you include a song, a story, a craft, a game or an activity where students get to move around, then they are going to learn the lesson in the context of the activity. They’ll be having so much fun that they won’t even realize that they’re learning, and you’ll be one happy teacher!

Here’s a great idea for a few ways to teach numbers 1-10 using the context of a banana…

Let’s start with a song. This song is great for very young learners, and you can expand on it for slightly older students (6-7) by asking what each group of bananas is doing:

Now let’s go for a game to reenforce the numbers that they have learned in the song. This game is great for small groups, but if you want to do it with a larger group, you just have to duplicate (or triplicate) the materials. I call this the “Banana Clothespins Game,” and it requires a little bit of preparation. You’ll need:

  • 10 half-sheets of card or paper, each decorated with 1-10 bananas (you can draw the bananas or print them on a computer)
    • These will be your 1-10 banana flashcards!
  • 55 clothespins (full-size clothespins work best for little fingers, but recycle them from home if you have them!)

Once you have your materials prepared, you’re ready to play!

Example of banana flashcards. Image Copyright Super Simple Learning.

  • Begin by showing the students the 1 banana flashcard and put 2 clothespins on it. Ask if it’s correct and let them help you fix it. Repeat with another banana flashcard, first giving the incorrect number and letting the students help you. Then give them two correct examples.
  • Now put all of the banana flashcards face-down and shuffle them. Deal them out evenly among students. Tell them that it’s a surprise and not to turn them over!
  • Put the clothespins in the middle of the group.
  • Explain the gameplay: Each student turns over his or her flashcards and puts the correct number of clothespins on the card. The first to finish all of his or her flashcards correctly wins (so you might want to make sure that you deal each student some high and low numbers to keep things fair).
  • Children love this game, and it can be played several times to review the numbers!

Now that students have practiced the numbers, let’s tell them a story about a little banana who falls out of a tree and wants to return to his family! This story is called “Fruit Story: ESL numbers/colors/fruit.” It also incorporates other fruits as well as colors!

If you are lucky enough to have a big budget for your classroom, you can also invest in this awesome monkey counting game that can be played in small groups. It’s available on Amazon!

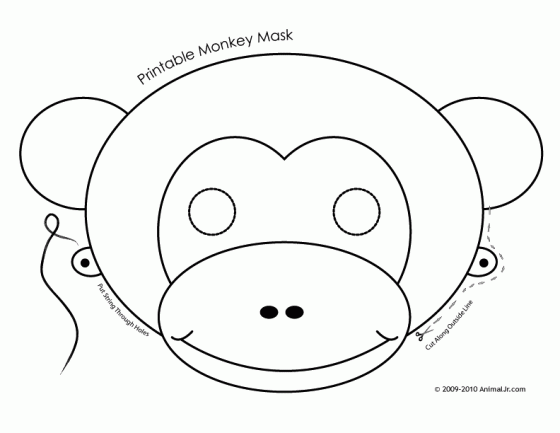
Now that we’ve talked gone bananas over numbers, let’s make a craft! What animal loves bananas more than anything else? Monkeys! Let your students make a monkey mask, helping them to cut out the eyes carefully. You’ll need a little yarn to tie on the mask.

Courtesy of craftjr.com

Courtesy of craftjr.com

You can print off some bananas with this image and let each student “feed the monkeys.” Try to print 10-15 on one page so that you can give students different numbers to practice! This is a great way to review counting again, as you can ask how many bananas they are feeding each other. Let them show the rest of the group and then do it in pairs!

These activities will give you several fun classes to learn and review the numbers 1-10 with your young learners! Just don’t go bananas when you hear students ask again for the banana song!


A New Twist for Old MacDonald

Old MacDonald is one of the most tried and true ways to introduce animals to ESL / EFL young learners. So what do you do when students say “I already know this song?”

How much fun would this be for young learners? Game available from bigjigstoys.co.uk

Here are a few ways that you can put a new twist on Old MacDonald.

First, I love this video by Super Simple Learning: Old McDonald by Super Simple Learning. This video is great because it introduces different animals and kids can sing along but it includes a new area of this age-old topic: what do the animals say?

Next, I love these flashcards to play simple games: ESL-kids.com Animals Flashcards. You can play “Guess the animal,” “Charades (again, the animal sounds from the previous song come in handy!),” “What color is the animal?,” etc. You can print them with or without words and choose your own images based on what you want to teach.

Finally, I love to let my young learners create their own farm. I use a blank farm template (like this one) and give them lots of little animals (like these or these). They love cutting, coloring, and gluing the animals in their own farms. Give them some special decorations like glitter glue or water colors and they will be entertained for hours!

Once your little ones master the MacDonald, you can expand their animal learning with other awesome activities!

One of my favorites is based on the song “Walking in the Jungle” by Super Simple Songs. Students love this song, especially if they mimic the motions of the children!

Then, grab a bunch of hand puppets (such as these, available on Amazon.com) and repeat the song with your own animals. Let your students decide if “they are afraid!”

What’s your favorite way to teach animals to young learners?

Popsicle Stick Puzzles

I love making popsicle stick puzzles with my students because they are so versatile! They work well for students as young as two and as old as ten!

Lots of amazing popsicle stick puzzle on Pinterest.com

You need very few materials to make a popsicle stick puzzle, and you can use them for specific lesson themes or as an extra activity! They are a great activity for fast finishers in the classroom!

You can make several popsicle stick puzzles to work on a particular vocabulary set, such as these animal puzzles:

Copyright 2corinthians1311.blogspot.com

Or you can have students create their own popsicle stick puzzles as a time filler:

Copyright blog.austinkids.org

In order to make popsicle stick puzzles, you will need:

  • 10 popsicle sticks per student (I buy popsicle sticks in bulk at Asian bazars or “chinos” here in Madrid)
  • tape
  • decorations, like:
    • paint and paintbrush
    • markers
    • crayons
    • pictures and glue
  • scissors

Here’s how you make popsicle stick puzzles!

  1. Line up 10 popsicle sticks and tape the top, middle and bottom of the sticks together.
  2. Turn the popsicle sticks over and decorate.
  3. After they are dry, remove the tape. If you have glued a picture to the front of the popsicle sticks, you will need to use a razor blade or scissors to cut apart the picture between the sticks. Do not let children complete any steps with razors or scissors if they are not able to do so safely.
  4. Mix up the sticks and let students put them together!
2014-07-17 09.01.22

Copyright lessonplansesl.wordpress.com

Here are a few of the popsicle stick puzzles that I made with my students this summer! One student was two and one was five. Since we were working on colors and numbers at the time, I focused on the primary colors and numbered the back of each popsicle stick (1-10) so that they could put them in order based on numbers and then based on the picture.

Copyright lessonplansesl.wordpress.com

Copyright lessonplansesl.wordpress.com